That dead space above your toilet is prime real estate. Whether you’re dealing with a cramped half-bath or a full bathroom that’s short on storage, over-the-toilet cabinets turn wasted vertical space into organized storage without a major renovation. These units hold everything from extra towels and toiletries to cleaning supplies, all within arm’s reach but out of sight. Installation ranges from dead-simple freestanding units to wall-mounted cabinets that need a stud finder and a level. This guide covers what works, what doesn’t, and how to pick and install the right setup for your bathroom.
Table of Contents
ToggleKey Takeaways
- Over the toilet cabinet storage maximizes unused vertical space in bathrooms without requiring renovation, demo, or permits—turning 2–3 feet of wasted clearance into functional organization.
- Choose between freestanding units (no tools required, renter-friendly) and wall-mounted cabinets (higher weight capacity, better floor space efficiency) based on your bathroom size and permanence needs.
- Before purchasing an over the toilet cabinet, measure toilet width, ceiling height, and available depth behind the tank to ensure proper fit and clearance above the lid.
- Wall-mounted cabinets must anchor into studs for loads over 20 pounds; heavy-duty toggle anchors can work for drywall-only areas, but stud mounting is safer for enclosed cabinets and heavier items.
- Select moisture-resistant materials like solid wood, marine-grade plywood, or powder-coated metal frames for humid bathrooms to prevent swelling, delamination, and rust.
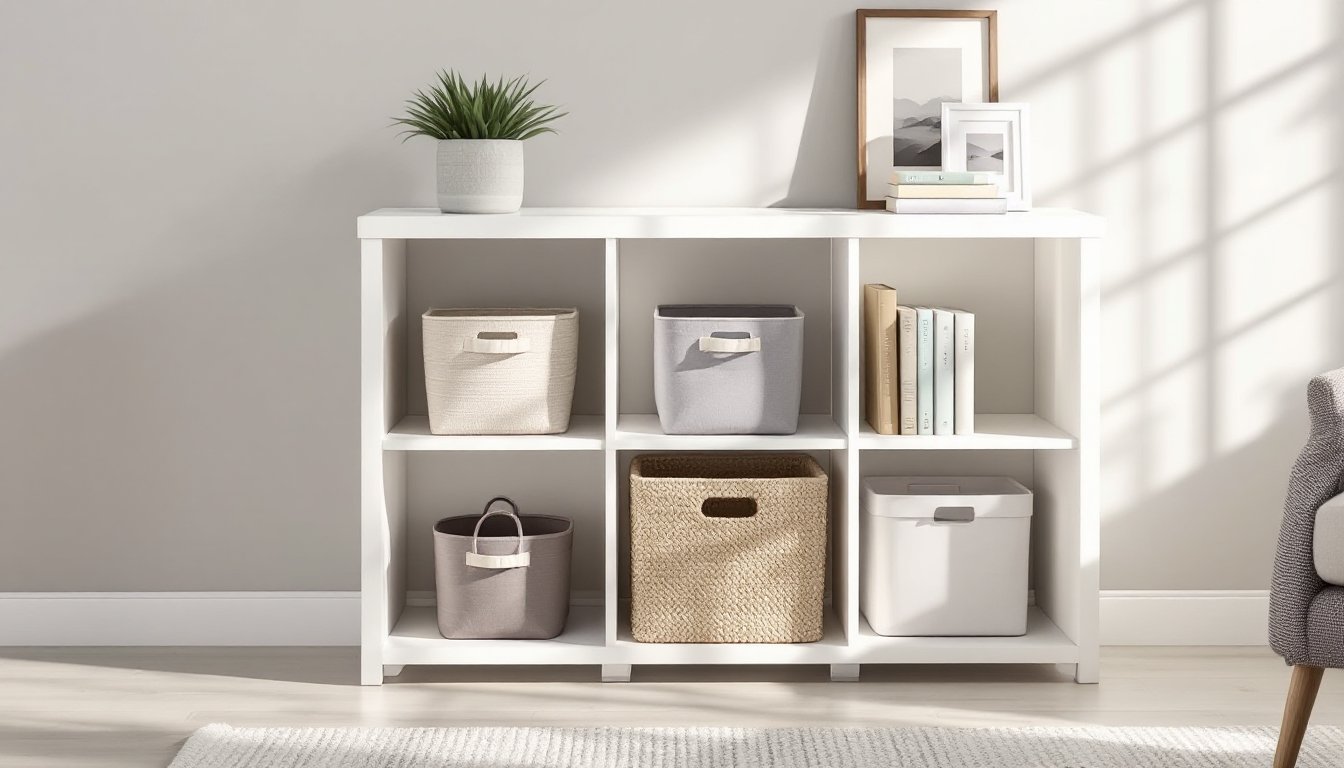
- Organize your over the toilet storage using bins, turntables, shelf risers, and labels to maximize space efficiency and create a cohesive, styled appearance that matches your bathroom décor.
Why Over the Toilet Storage Is a Game-Changer for Small Bathrooms
Most bathrooms waste 2–3 feet of vertical clearance above the tank. Standard toilets sit around 28–30 inches tall, leaving plenty of room below an 8-foot ceiling for shelving or cabinetry. Over-the-toilet storage capitalizes on that unused zone without eating into floor space, a critical advantage in bathrooms under 40 square feet.
Unlike vanity expansions or linen closet builds, over-the-toilet units don’t require demo, plumbing reroutes, or permits. A freestanding étagère can be assembled and positioned in under an hour. Wall-mounted cabinets take more effort but free up even the footprint occupied by freestanding legs, which matters in tight quarters where every inch counts.
These units also keep daily essentials accessible. Toilet paper, hand towels, and grooming supplies stay within reach instead of buried in a hallway closet. For renters, freestanding models offer full functionality without anchor holes or lease violations. Homeowners get the option to go permanent with wall mounts that feel more built-in and can support heavier loads.
Types of Over the Toilet Cabinets and Storage Units
Freestanding Over the Toilet Cabinets
Freestanding units rest on the floor and straddle the toilet tank with two side posts or a frame. They’re the simplest option: no drilling, no anchors, just slide into place. Most models include two or three open shelves or a combination of shelves and a cabinet with doors.
Typical dimensions: 24–28 inches wide (to clear a standard toilet), 60–72 inches tall, and 8–10 inches deep. Deeper shelves (10+ inches) hold folded towels and bulk items: shallower designs work for toiletries and décor.
Materials: Particleboard with laminate veneer is budget-friendly but vulnerable to moisture. Solid wood or engineered wood with water-resistant finish holds up better in humid bathrooms. Metal frames with wire or slatted shelves offer an industrial look and excellent ventilation, reducing mildew risk.
Pros: No tools required for most assembly. Renters can take them along. Easy to reposition if you rearrange fixtures.
Cons: The footprint can block access for cleaning around the toilet base. Stability depends on level flooring, tile lippage or uneven subflooring can cause wobble. Weight capacity is lower than wall-mounted options since all load transfers through the legs.
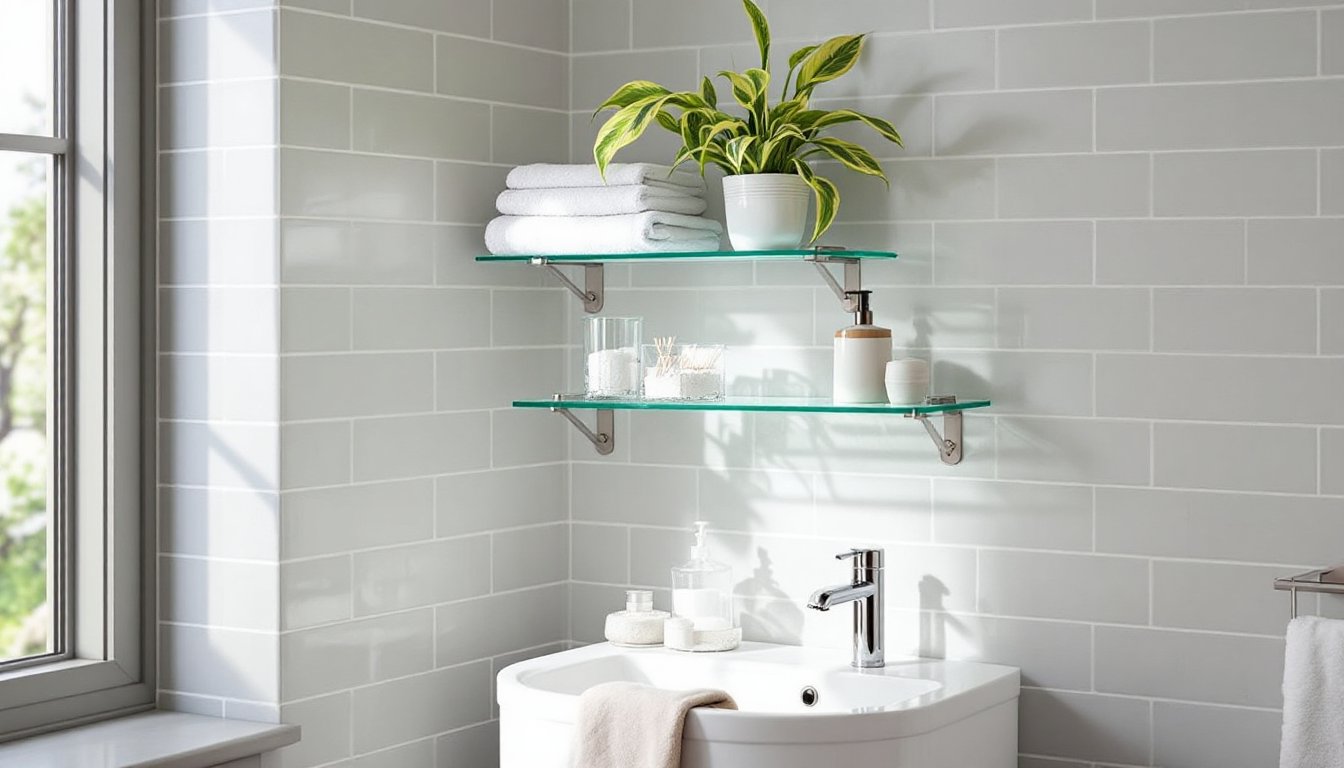
Wall-Mounted Cabinets and Shelving
Wall-mounted units attach directly to studs or blocking, floating above the toilet without floor contact. They range from single-tier open shelves to full enclosed cabinets with doors and interior compartments.
Installation requirements: Locate studs with a stud finder (studs are typically spaced 16 inches on center in modern framing). For drywall-only areas, install blocking between studs or use heavy-duty toggle anchors rated for the cabinet’s loaded weight. Most enclosed cabinets weigh 30–50 pounds empty and can hold another 20–40 pounds of contents.
Clearance: Mount shelves at least 6–10 inches above the toilet tank to allow for lid removal and tank access. The over-the-toilet storage products on the market often specify minimum clearances in their specs, check before buying.
Pros: Maximizes floor space for easier cleaning. Higher weight capacity when properly anchored to studs. Looks more integrated and custom, especially with painted or finished cabinetry that matches vanity millwork.
Cons: Installation takes more skill and time. Requires power drill, level, stud finder, and potentially a second person to hold the unit during mounting. Permanent anchor holes mean patching if removed. Incorrect anchoring into drywall alone risks failure and damage.
How to Choose the Right Over the Toilet Cabinet for Your Bathroom
Measure twice, buy once. Before shopping, record three dimensions: toilet width (measure tank and bowl at widest points), ceiling height, and depth available behind the toilet without blocking the door swing or impeding movement.
Standard toilets are 28–30 inches wide: compact or corner models may be narrower. Leave at least 1 inch clearance on each side of the toilet for the cabinet legs or frame. For depth, measure from the wall to the front edge of the tank, then add your desired shelf depth. Shelves deeper than 12 inches can overhang the tank but may interfere with sitting or standing.
Match the style to existing finishes. In a bathroom with a dark wood vanity, a white particleboard étagère will look like an afterthought. Espresso, walnut, or painted finishes that echo cabinetry create cohesion. For modern or industrial baths, matte black or brushed nickel metal frames blend better than traditional wood tones.
Assess moisture resistance. Bathrooms with showers or tubs generate humidity. Solid wood, marine-grade plywood, or moisture-resistant MDF handle condensation better than plain particleboard, which can swell and delaminate. Metal frames resist moisture but may show water spots or rust if the finish is compromised. Look for powder-coated or stainless finishes in humid environments.
Decide between open shelves and enclosed cabinets. Open shelves keep items visible and easy to grab but collect dust and look cluttered if not styled. Enclosed cabinets hide clutter and protect contents from dust and humidity, but they cost more and add visual weight. A hybrid, open shelves on top, cabinet below, offers flexibility.
Check weight capacity. Shelves rated for 10–15 pounds are fine for toiletries and hand towels. If storing bulk toilet paper packs, cleaning supplies, or multiple thick towels, look for 20–30 pound capacity per shelf. Wall-mounted cabinets anchored to studs generally handle more load than freestanding units.
Installation Tips and DIY Considerations
Freestanding assembly: Most flat-pack units use cam-lock fasteners or basic screws. Lay out all hardware before starting, missing a cam dowel means a wobbly joint. Assemble on a flat surface, not in the bathroom, to ensure square corners. Tighten connections snugly but don’t over-torque particleboard: stripped holes won’t hold.
Once assembled, slide the unit over the toilet. If it rocks, check for uneven tile or flooring. Small adjustable feet can compensate for minor level issues. Shim under legs if needed, using plastic shims rather than cardboard (which compresses and absorbs moisture).
Wall-mounted installation:
- Locate studs. Use a stud finder and mark centers with painter’s tape. Studs are usually 1.5 inches wide (actual dimension of a 2×4 or 2×6).
- Mark mounting holes. Hold the cabinet or mounting bracket against the wall at the desired height. Use a level to ensure it’s plumb. Mark hole locations through the bracket with a pencil.
- Pre-drill pilot holes. For wood studs, drill pilot holes slightly smaller than the screw diameter to prevent splitting. For drywall with toggle anchors, drill the size specified by the anchor manufacturer (usually 1/2 inch for medium toggles).
- Attach the mounting bracket or cabinet. Drive screws into studs using a power drill or impact driver. If using toggles, insert the anchor, then tighten the screw to expand the wings behind the drywall. Don’t rely on drywall anchors alone for cabinets heavier than 20 pounds.
- Hang the cabinet (if using a bracket system). Some models use a French cleat or keyhole slots. Lift the cabinet onto the mounted bracket, ensuring it seats fully.
Safety: Wear safety glasses when drilling overhead, drywall dust and debris fall into eyes. Use a dust mask if drilling into old plaster or tile, which may contain silica.
When to call a pro: If your bathroom has tile or stone walls, drilling into studs through tile requires a carbide or diamond bit and careful technique to avoid cracking. Incorrectly placed holes can crack expensive tile. If you’re not confident, hire a handyman or carpenter. Similarly, if you can’t locate studs (common in older homes with irregular framing or metal studs), a professional can install blocking or use specialized anchors rated for your wall type.
Creative Ways to Organize Your Over the Toilet Cabinet
Use bins and baskets to corral small items. Clear acrylic or wire baskets keep contents visible: fabric bins hide clutter but require labels. Group by category: one bin for hair tools, another for first aid, another for extra soap and shampoo.
Turntables (lazy Susans) work well on deeper shelves. Spin to access items at the back without removing everything in front. They’re especially useful for bottles and jars of varying heights.
Shelf risers double usable space on tall shelves. A small riser lets you stack two layers of folded towels or toiletries without toppling.
Adhesive hooks on the inside of cabinet doors hold hair dryers, brushes, or cleaning gloves. Keep weight under 2 pounds per hook to avoid adhesive failure on particleboard or laminate.
Magazine files repurposed as vertical dividers organize flat items like washcloths, cleaning cloths, or packaged supplies. When styling bathroom cabinetry, vertical storage often makes better use of shelf height than horizontal stacking.
For budget-friendly modifications, creative furniture hacks can transform basic shelving units into custom storage solutions using pegboard inserts, tension rods, or removable drawer organizers.
Label everything. Even if you live alone, labels speed up restocking and prevent the “junk shelf” phenomenon. Use a label maker or printable stickers for a clean look.
Rotate seasonal items. Store beach towels and sunscreen in summer, extra blankets and cold-weather toiletries in winter. Keep daily essentials at eye level, occasional-use items on top shelves, and heavy or bulk items on lower shelves for stability.
Mind the sightlines. If your cabinet has open shelves, front-facing labels and uniform containers (matching baskets, matching jars) create a styled look. Mismatched packaging and clutter read as messy even if everything’s organized. For enclosed cabinets, function trumps aesthetics, use whatever containers maximize space.