Narrow entryways pack a challenge: you need a spot to drop shoes, stash bags, and sit down to tie laces, all in a footprint that’s often 18 inches wide or less. A narrow entryway bench with storage solves this puzzle by combining seating with hidden compartments, keeping clutter off the floor without eating up precious square footage. Whether you’re dealing with a cramped apartment hallway or a tight mudroom, the right bench transforms dead space into functional storage. This guide breaks down what to look for, how to pick materials that last, and how to build one yourself if you’re ready to pull out the saw.
Table of Contents
ToggleKey Takeaways
- A narrow entryway bench with storage solves three problems simultaneously: providing seating, hiding daily clutter, and defining the entryway space in homes without dedicated mudrooms.
- The ideal dimensions for a narrow entryway bench are 36 to 48 inches wide and 16 to 18 inches deep, fitting tight hallways without blocking doorways or creating traffic hazards.
- Choose materials and finishes based on durability needs—solid hardwood or cabinet-grade plywood with polyurethane topcoats resist moisture and wear better than particleboard or MDF in high-traffic entryways.
- A DIY narrow storage bench with a lift-top design and internal dividers can be built over one weekend using basic tools, intermediate woodworking skills, and a materials budget under $200.
- Maximize storage capacity in a narrow bench by adding slide-out baskets, vertical dividers, toe-kick drawers, and wall-mounted hooks or pegs that keep accessories within reach without eating floor space.
- Always measure the entryway footprint twice and mock it up with cardboard before purchasing materials to prevent blocking door swings or reducing traffic flow in tight spaces.
Why a Narrow Entryway Bench With Storage Is Essential for Small Homes
Small homes don’t offer the luxury of a dedicated mudroom or coat closet, so entryways become dumping grounds. Shoes pile up, bags hang on doorknobs, and keys vanish into the couch cushions because there’s nowhere to put them.
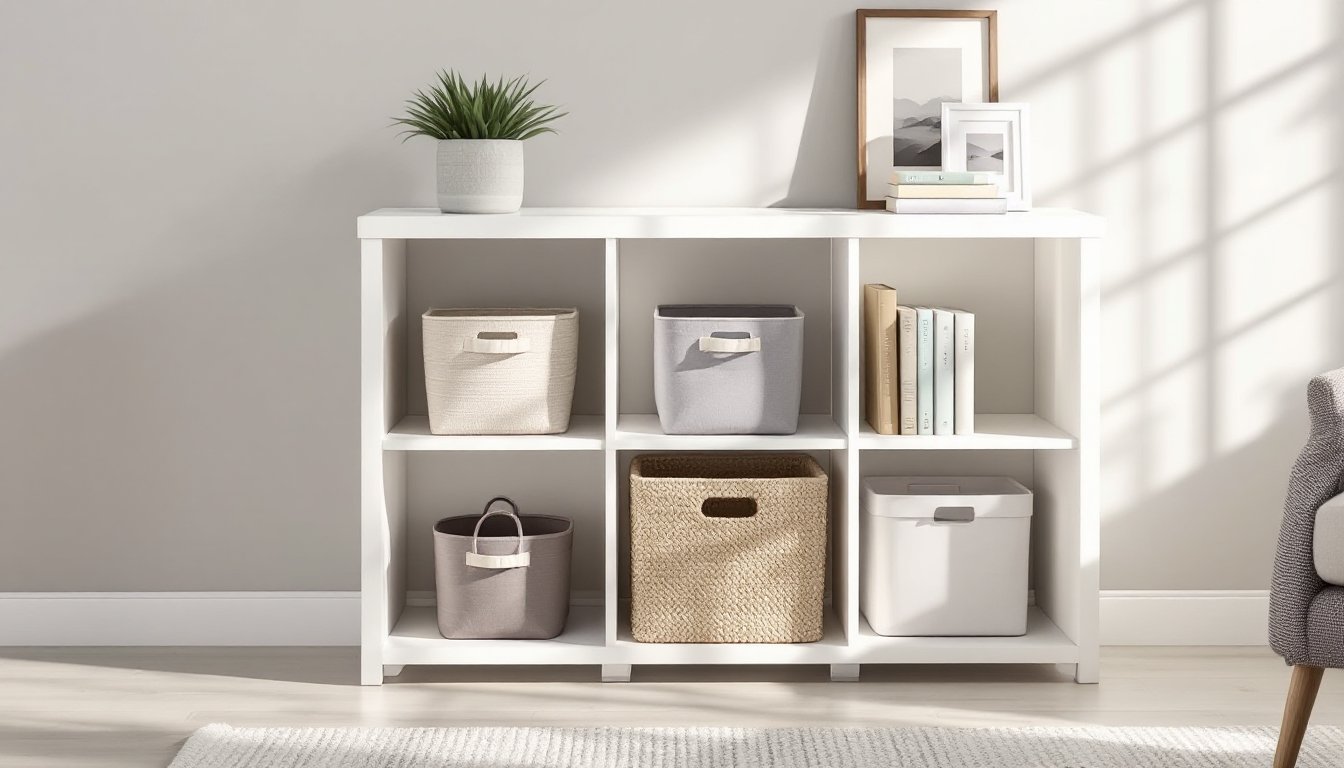
A narrow storage bench (typically 12 to 18 inches deep) solves three problems at once. First, it provides seating so people can sit to remove boots instead of hopping around on one foot. Second, the built-in storage, cubbies, baskets, lift-top compartments, keeps everyday items like gloves, hats, and dog leashes out of sight. Third, it defines the entryway visually, creating a transition zone between outdoors and living space.
In apartments and older homes with tight hallways, a bench that’s 36 to 48 inches wide and less than 18 inches deep fits without blocking doorways or creating a traffic jam. It’s compact enough to tuck against a wall but functional enough to hold a family’s daily essentials. For renters, a freestanding bench is easy to move without patching drywall or dealing with landlord restrictions.
Beyond function, a bench adds a finished look. It’s the difference between a bare wall with shoes scattered underneath and a deliberate design choice that says someone actually lives here and keeps things organized.
Top Features to Look for in a Narrow Storage Bench
Not all narrow benches deliver equal storage or durability. Start with depth: benches under 14 inches deep fit tighter spaces but sacrifice seating comfort. A 16 to 18-inch depth offers better support without jutting too far into walkways.
Storage type matters. Lift-top benches with hinged lids provide one large compartment, great for bulky items like winter coats or sports equipment. Look for soft-close hinges or lid supports to prevent pinched fingers and slamming. Cubbies or open shelving underneath the seat make it easier to grab shoes in a hurry, but they don’t hide clutter as well. Drawers or slide-out baskets offer a middle ground: hidden storage that’s still accessible.
Check the weight capacity of the seat. A solid bench should support at least 250 pounds for one adult or two kids sitting side-by-side. Benches with thin plywood seats or flimsy corner bracing sag after a few months of use. Look for 3/4-inch plywood or solid wood slats on the seat surface, with cross bracing underneath.
Finish and edge details affect longevity. If the bench will catch wet boots or spills, choose water-resistant finishes like polyurethane or laminate. Unfinished pine or MDF soaks up moisture and swells. Rounded or chamfered edges prevent sharp corners from catching on pant legs or scraping shins in tight spaces.
Finally, consider height. Standard bench seating is 17 to 18 inches tall, comfortable for most adults. Lower benches (14 to 16 inches) work for kids but feel awkward for adults to use daily.
Best Materials and Styles for Narrow Entryway Benches
Material choice drives durability, cost, and how well the bench fits the room’s aesthetic. Here’s what works and where each material shines.
Wood Benches for Timeless Appeal
Solid wood, pine, oak, maple, or walnut, handles daily wear better than composite materials. Pine is budget-friendly and easy to stain or paint, but it dents easily under heavy use. Oak and maple resist dings and scratches, making them ideal for high-traffic entryways. Expect to pay more: a solid oak bench runs $200 to $400 depending on size and finish.
Plywood construction (Baltic birch or cabinet-grade) offers strength at a lower price point than solid hardwood. A 3/4-inch plywood carcass with hardwood trim strikes a balance between cost and durability. Avoid particleboard or MDF cores in humid climates, they swell and delaminate when exposed to moisture from wet shoes or rain-soaked coats.
Finish matters as much as wood species. Polyurethane topcoats (satin or semi-gloss) protect against water rings and scuffs. For a natural look, hard wax oil finishes like Rubio Monocoat penetrate the wood and resist moisture without the plastic sheen of poly. Plan on reapplying wax annually in heavy-use areas.
Traditional styles, Shaker, farmhouse, mission, use simple lines and minimal ornamentation, which keeps narrow benches from looking cluttered in tight spaces. A Shaker-style bench with flat panel doors and tapered legs fits hallways as narrow as 36 inches without overwhelming the room.
Metal and Industrial Options for Modern Entryways
Steel or wrought iron frames paired with wood or upholstered seats create a lighter visual footprint than all-wood designs. A metal frame bench with open lower shelving doesn’t block sightlines, making cramped entryways feel less closed-in. Look for powder-coated finishes on steel, bare metal rusts when exposed to wet boots.
Hairpin legs or tubular steel supports reduce the bench’s footprint to 12 inches deep while still supporting 200+ pounds. These work well in modern or mid-century interiors but can feel too minimal in traditional homes.
Industrial-style benches often incorporate perforated metal panels or wire baskets for storage. These allow airflow around damp shoes, preventing mildew buildup that’s common in closed cubbies. The tradeoff: they don’t hide clutter, so this style works best for people who keep their entryways tidy.
DIY Narrow Entryway Bench: How to Build Your Own Storage Solution
Building a narrow storage bench requires intermediate woodworking skills, a few basic tools, and a free weekend. This design uses a lift-top seat with a hinged lid and measures 42 inches wide by 16 inches deep by 18 inches tall, narrow enough for tight hallways, sturdy enough for daily use.
Materials list:
- Two sheets of 3/4-inch plywood (4×8 feet), one for the carcass, one for the seat and dividers
- 1×2 pine trim for face frames and edge banding (12 linear feet)
- Piano hinge (36 inches long) for the lift-top seat
- Wood glue and 1-1/4-inch brad nails or pocket screws
- Sandpaper (80, 120, 220 grit)
- Primer and paint or stain and polyurethane
Tools needed:
- Circular saw or table saw for cutting plywood
- Miter saw for trim pieces (optional but cleaner than a circular saw)
- Drill/driver with countersink bit
- Pocket hole jig (if using pocket screws instead of brad nails)
- Clamps (at least four 24-inch bar clamps)
- Sander (random orbital saves time: sanding block works for small batches)
Step-by-step build:
-
Cut the plywood panels. You’ll need two side panels (16 x 18 inches), one back panel (42 x 18 inches), one bottom panel (40.5 x 14.5 inches), and one top/seat panel (42 x 16 inches). A table saw gives cleaner cuts, but a circular saw with a straightedge guide works if you take your time.
-
Assemble the box. Apply wood glue to the edges and join the sides, back, and bottom using 1-1/4-inch brad nails or pocket screws. Pre-drill holes if using screws to prevent splitting. Clamp until the glue sets (20–30 minutes). Check for square by measuring diagonals, they should match within 1/8 inch.
-
Add internal dividers (optional). For cubbies, cut vertical dividers from 3/4-inch plywood to fit inside the box (14.5 x 16 inches). Space them 12 to 14 inches apart and secure with glue and brad nails. Dividers keep shoes separated and stiffen the structure.
-
Install the piano hinge. Attach one leaf of the hinge to the back edge of the seat panel, then attach the other leaf to the top back edge of the box. Piano hinges distribute weight evenly, preventing sagging. For added safety, install a lid support bracket on each side to hold the lid open and prevent it from slamming shut.
-
Apply edge banding and trim. Cover exposed plywood edges with 1×2 pine trim using glue and brad nails. Miter the corners at 45 degrees for a clean look (a miter saw makes this easier). Sand all surfaces with 120-grit, then 220-grit sandpaper.
-
Finish and seal. Prime raw wood with a stain-blocking primer, then apply two coats of semi-gloss paint for easy cleaning. If staining, use a pre-stain wood conditioner on pine to prevent blotching, then topcoat with three coats of polyurethane (sanding lightly between coats with 220-grit).
Many DIYers find detailed build plans helpful for visualizing joinery and cut lists. If this is your first furniture build, practice pocket hole joints on scrap wood before committing to the final assembly.
Safety note: Wear safety glasses when cutting and nailing, and a dust mask when sanding or applying finishes. Work in a ventilated area, polyurethane fumes are harsh.
Creative Ways to Maximize Storage in a Narrow Bench
A narrow footprint doesn’t mean sacrificing storage capacity. Smart design tweaks and add-ons multiply what a 16-inch-deep bench can hold.
Vertical dividers inside the bench create individual cubbies for each family member’s shoes, preventing the jumbled pile effect. Cut dividers from 1/2-inch plywood and space them 10 to 12 inches apart. Label cubbies with chalkboard paint or adhesive name tags if you have kids.
Slide-out baskets or fabric bins keep smaller items, scarves, dog leashes, sunglasses, corralled without drilling extra shelves. Wire baskets allow airflow: fabric bins hide clutter better. Measure the interior width before buying bins to avoid gaps or overhang.
Hooks or pegs mounted on the wall above the bench add vertical storage for coats, bags, or umbrellas without increasing the bench’s footprint. Install a cleat or French cleat system so the bench can hang directly on the wall, freeing up floor space underneath for taller boots.
Cushions with hidden storage turn the seat into a dual-purpose zone. Some upholstered cushions have zippered compartments for seasonal items like winter gloves or pet supplies. Use outdoor fabric (like Sunbrella) if the bench sits near an exterior door, it resists moisture and cleans easily.
Toe-kick drawers installed at the base of the bench capture otherwise wasted space. These shallow drawers (3 to 4 inches tall) slide out from under the bench and work well for flat items like shoe inserts, pet leashes, or mail. Building toe-kick drawers requires undermount drawer slides and careful measurement, so this is an intermediate upgrade. Browsing project galleries can spark ideas for integrating toe-kick storage into existing designs.
Magnetic strips or pegboard panels inside the lid of a lift-top bench organize keys, charging cables, or small tools. Stick adhesive-backed magnetic strips to the underside of the lid, or mount a piece of 1/4-inch pegboard with small hooks for lightweight items.
For families with young kids, pull-out step stools tucked into the bench’s base let shorter users reach coat hooks without dragging a chair from the kitchen. These require full-extension drawer slides and a sturdy frame to support 100+ pounds. Homeowners tackling this level of customization often reference step-by-step tutorials to nail the joinery and hardware installation.
Final tip: Measure twice, cut once. Narrow benches leave little room for error, an extra inch in depth can block a door swing, and an inch too short creates an awkward gap. Mock up the bench’s footprint with cardboard boxes before committing to materials, and live with the mock-up for a few days to confirm it doesn’t interfere with traffic flow or door clearances.