A cluttered desk with pens rolling everywhere and sticky notes buried under paper stacks isn’t just annoying, it kills productivity and makes even simple tasks take longer. Most home offices fail not because of bad intentions, but because there’s no system for storing supplies where they’re needed. The good news? Organizing office supplies doesn’t require expensive custom cabinetry or a complete room redesign. With some basic materials, simple DIY projects, and a little planning, anyone can build storage that actually works. This guide covers practical solutions that fit real workspaces, from quick household hacks to custom-built organizers that maximize every inch.
Table of Contents
ToggleKey Takeaways
- Proper office supply storage eliminates wasted time searching for items, prevents duplicate purchases, and protects supplies from damage and deterioration.
- Assess and sort your entire inventory by category before building or buying storage, then remove unused or dried-out items to size your system accurately.
- Repurpose household items like mason jars, drawer dividers, spice racks, and shoe organizers for quick, low-cost office supply storage without permanent commitment.
- Build custom drawer organizers from ¼-inch plywood with interlocking dividers to fit exact dimensions and hold precisely what your workspace needs.
- Maximize vertical space with pegboard systems, floating shelves, and wall-mounted file holders to keep desk surfaces clear in small home offices.
- Contain small items like paper clips and pushpins in compartmented trays, glass jars, or drawer inserts with labeled dividers so each supply type has a consistent home.
Why Proper Office Supply Storage Matters
Office supply chaos creates three real problems: wasted time hunting for items, duplicate purchases because no one knows what’s already on hand, and damaged supplies shoved into overstuffed drawers. A well-organized storage system solves all three.
Proper storage keeps frequently used items within arm’s reach while tucking away seasonal or backup supplies. It prevents desk clutter from spreading across work surfaces, which matters when a home office doubles as a guest room or dining area. Clear visibility means knowing when to restock before running out mid-project.
Good storage also protects investment. Pens dry out when left uncapped, labels curl in humidity, and paper gets crushed under heavy staplers. Dedicated spots with proper containers extend the life of supplies and keep everything functional. For DIYers, this is no different than organizing fasteners in a workshop, the right system pays back the setup time within weeks.
Assess Your Office Supply Inventory
Before building or buying storage, dump everything out and sort by category. Common groups include:
- Writing tools: pens, pencils, markers, highlighters
- Adhesives: tape (clear, double-sided, washi), glue sticks, sticky notes
- Paper goods: printer paper, notepads, envelopes, labels
- Fasteners and clips: staples, paper clips, binder clips, pushpins
- Tools: scissors, rulers, staplers, hole punches, letter openers
- Tech accessories: charging cables, USB drives, batteries
- Reference items: stamps, business cards, return address labels
Separate daily-use items from backup stock. If someone reaches for it more than twice a week, it’s daily-use. Everything else is backup. Toss dried-out pens, tangled rubber bands, and promotional notepads no one will actually use. This isn’t sentimental, it’s workspace efficiency.
Measure quantities honestly. Twelve black pens is reasonable: forty-seven means there’s a hoarding problem or no accountability. Count current inventory to size storage correctly. A drawer organizer that holds eight pens won’t help if there are thirty to store.
DIY Office Supply Storage Ideas
Repurpose Household Items for Creative Storage
Before cutting plywood, look around the house. Many containers work perfectly for office supplies without modification.
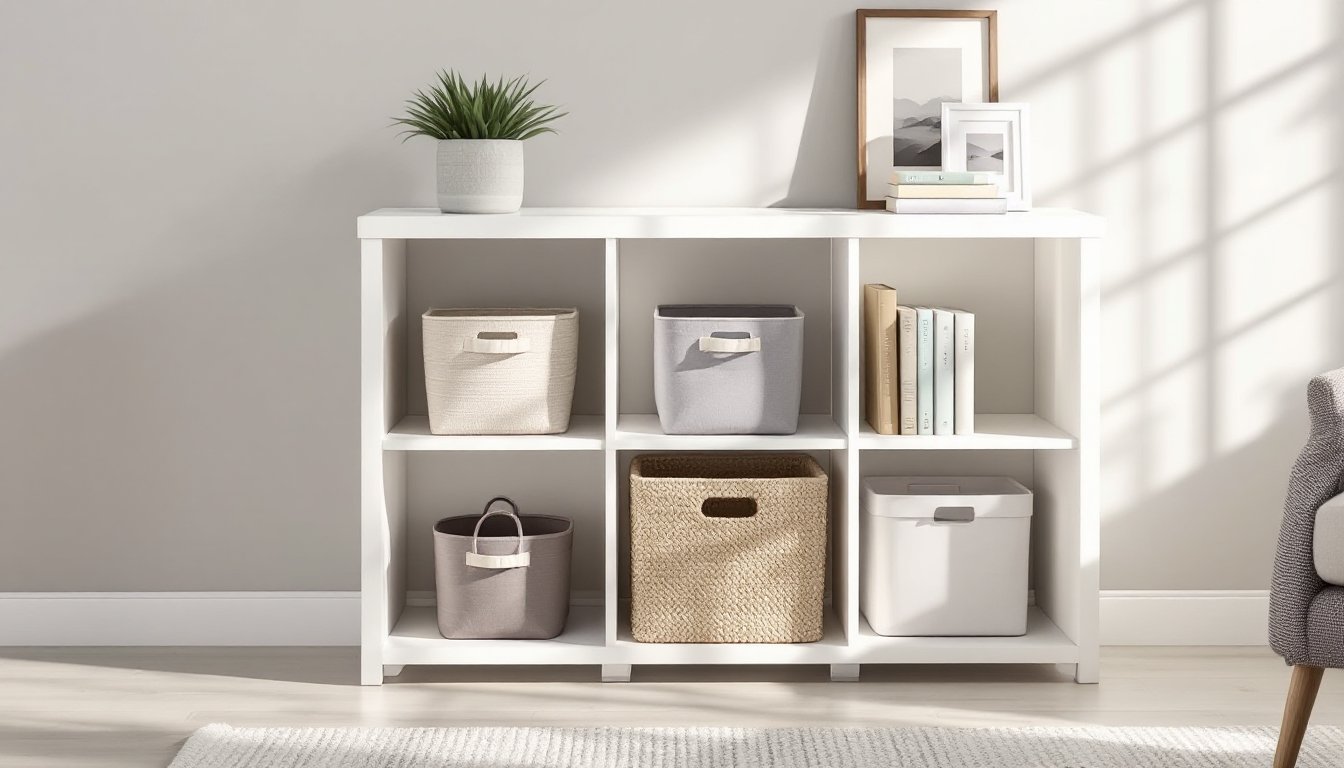
Mason jars hold pens, scissors, and rulers upright on a desk or shelf. Group similar items per jar and arrange by height for easy access. Use pint or quart sizes depending on quantity.
Drawer dividers from kitchens fit standard desk drawers. Bamboo expandable dividers adjust to drawer width and create compartments for different supply types. They cost less than office-specific versions and work identically.
Spice racks (the tiered kind) store small items like tape rolls, sticky note pads, and correction fluid. Mount one inside a cabinet door or on the wall beside a desk. The stepped design keeps everything visible.
Shoe organizers with clear pockets hang on doors or walls. Each pocket holds a supply category, one for notepads, one for envelopes, one for batteries. This works especially well in small spaces where drawer space is limited.
Magnetic strips (intended for knives) mounted on walls or inside cabinet doors hold metal items like scissors, clips, and pushpins. Use ¾-inch thick strips for better hold. Screw into studs or use heavy-duty adhesive rated for the weight.
These solutions cost little to nothing and take minutes to set up. They’re ideal for renters or anyone testing layouts before committing to permanent installations.
Build Custom Drawer Organizers
Custom drawer organizers beat store-bought versions because they fit exact dimensions and hold precisely what’s needed. The simplest design uses ¼-inch plywood or hardboard cut into dividers that slot together.
Materials:
- ¼-inch plywood or MDF (one 2′ × 4′ sheet covers most desk drawers)
- Wood glue
- Sandpaper (120-grit)
- Measuring tape
- Straightedge
- Circular saw or table saw
Steps:
-
Measure the drawer interior precisely, width, depth, and height. Subtract ⅛ inch from width and depth measurements so the organizer slides in and out easily.
-
Plan the grid. Sketch the layout on paper. Common configurations include three long strips running front-to-back with several short cross-dividers. Size compartments to actual supplies, a pen slot should be about 3 inches wide: a stapler needs 4–5 inches.
-
Cut dividers. Mark plywood and cut strips to length. For interlocking dividers, cut slots halfway through each piece where they cross. Slot width should match material thickness (¼ inch). A table saw with a dado blade makes consistent slots: otherwise, make multiple passes with a circular saw and clean with a chisel.
-
Sand all edges smooth with 120-grit sandpaper. Splinters snag paper and fingers.
-
Dry-fit the grid by slotting pieces together. Adjust any tight fits with sandpaper. Once satisfied, apply a small amount of wood glue at each joint for permanent assembly, or leave unglued for future reconfiguration.
-
Finish (optional). Leave natural, stain, or paint. If painting, use a water-based primer and two coats of semi-gloss for easy cleaning.
This project takes about two hours including cutting and sanding. It’s a good first woodworking project, straight cuts, no fasteners, forgiving tolerances. A miter saw gives cleaner cuts than a circular saw, but both work.
Vertical Storage Solutions to Maximize Space
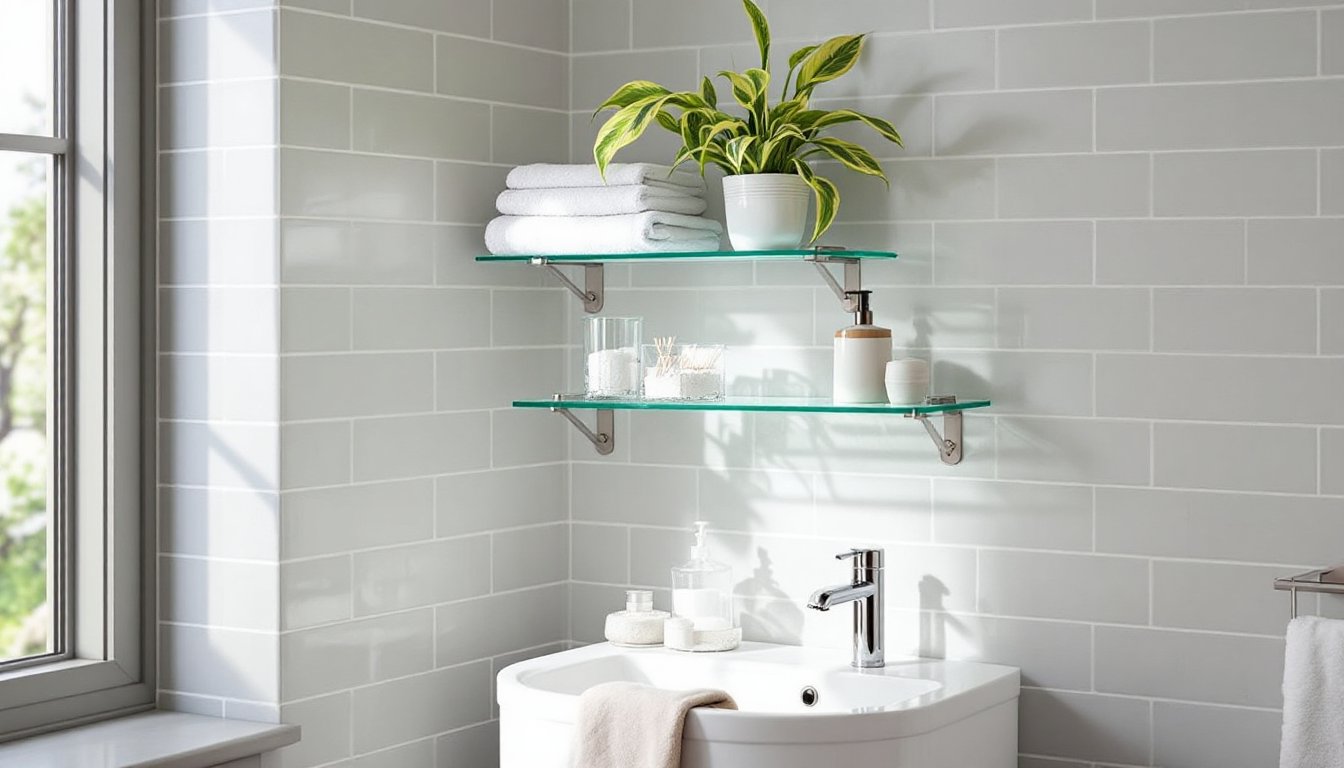
Vertical storage reclaims wall space and keeps desk surfaces clear. It’s especially valuable in small home offices where floor space is tight.
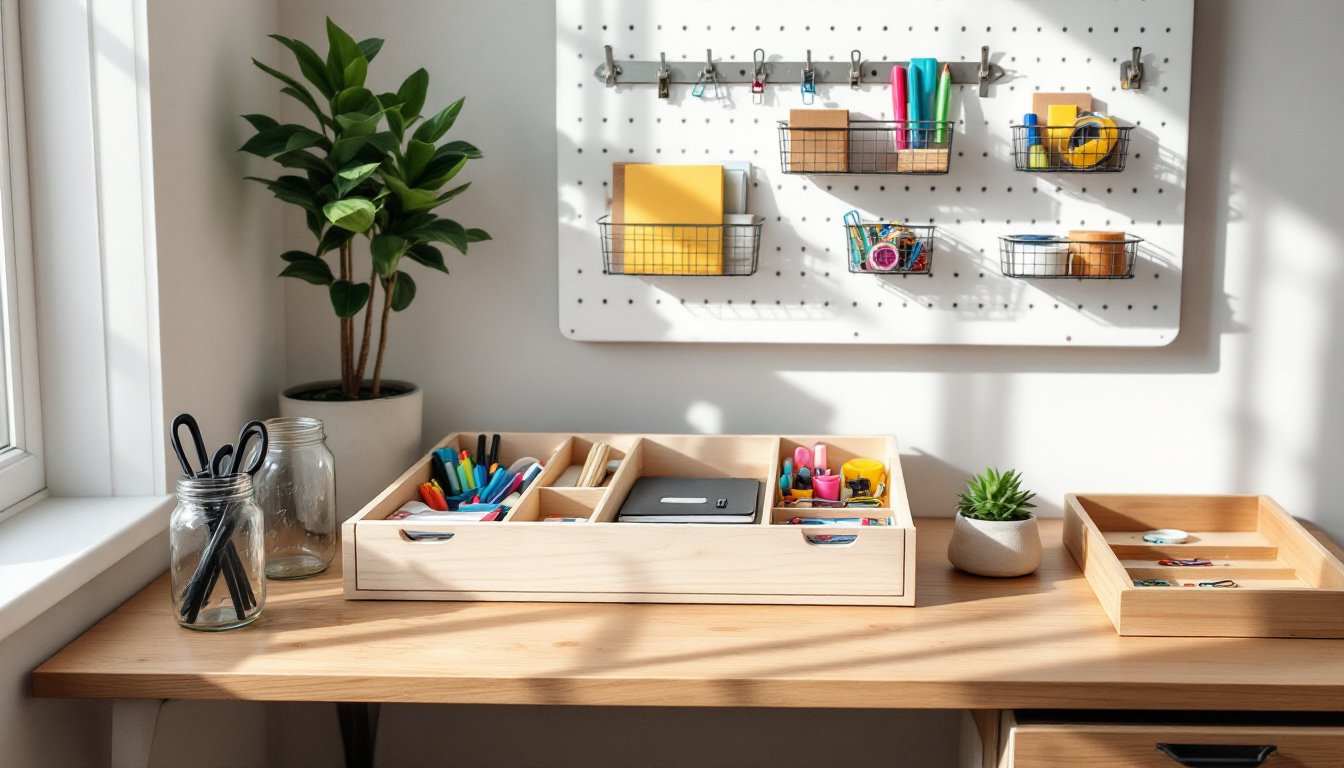
Pegboard systems offer flexible, reconfigurable storage. Mount a ¼-inch pegboard panel to the wall, leaving ¾-inch clearance behind it so hooks fit properly. Use furring strips (1×2 lumber) as spacers. Locate wall studs and screw through the pegboard and spacers into studs with 2-inch wood screws every 16 inches vertically and horizontally. Add pegboard hooks, baskets, and shelves as needed. Rearrange them anytime priorities change.
For a cleaner look, floating shelves hold bins and containers at eye level. Install shelves 12–16 inches apart so standard storage boxes fit between levels. Use concealed shelf brackets rated for at least 20 pounds per bracket, and anchor into studs whenever possible. In drywall without stud backing, use toggle bolts rated for the expected load.
Wall-mounted file holders keep active project folders visible and accessible without using desk space. Metal mesh versions attach with screws or command strips depending on weight. Position them beside the desk within easy reach while seated.
Magnetic boards or metal sheets mounted on walls hold magnetic containers, clips, and small metal tools. This works well above a desk where vertical space goes unused. A 24-gauge steel sheet from a hardware store costs less than specialty magnetic boards and can be painted any color.
When mounting anything to walls, remember: if it holds more than a few pounds, find a stud or use appropriate drywall anchors. Toggle bolts and molly bolts handle significant weight in drywall, but screwing into solid wood framing is always stronger. Use a stud finder to locate framing before drilling. Safety note: always wear safety glasses when drilling overhead to keep debris out of eyes.
Organizing Small Supplies and Accessories
Small items, paper clips, thumbtacks, binder clips, rubber bands, disappear into drawer corners or create visual noise if left loose. Contain them with purpose-built solutions.
Compartmented trays with 1–2 inch cells keep tiny supplies separated. Plastic craft organizers (the kind used for beads) work perfectly and cost a fraction of office-branded versions. Choose clear plastic to see contents at a glance.
Small glass jars or tins corral items on open shelves or desks. Baby food jars, spice jars, or mint tins are ideal sizes. Label each with a label maker or masking tape and marker. Group similar items: one jar for binder clips sorted by size, another for pushpins, another for spare staples.
Drawer inserts with adjustable dividers let someone customize compartment sizes. Spring-loaded dividers expand to fit drawer width and move as needs change. They’re sold for kitchen utensils but work identically for office gear.
For cable management, which often becomes a desktop nightmare, use velcro cable ties or binder clips attached to the desk edge. Run charging cables through the clip handles so they don’t slide off the desk when unplugged. For a more permanent solution, drill a 1-inch grommet hole through the desktop (if it’s not laminate over particleboard, which chips easily) and route cables through it to a power strip underneath. This keeps surfaces clear and reduces visual clutter.
Sticky notes and memo pads stack neatly in tiered acrylic holders or small open bins. Store them vertically so each size is visible and accessible. Don’t let them scatter across the desk, assign one spot and return them there.
Small-item storage succeeds when each category has a single, consistent home. The first time someone needs a paper clip, they should know exactly where to reach.